How to Connect a Countertop Dishwasher to a Faucet
Yes, you can connect a countertop dishwasher to your kitchen faucet. This is a popular and simple way to add a dishwasher without needing permanent plumbing. The process typically involves an adapter that screws onto your faucet spout and a hose that connects to the dishwasher. It’s a great solution for renters or those in smaller homes.
Many people wonder if this setup is reliable. We found that with the right parts and a secure connection, it works quite well for light to moderate dishwasher use. It’s important to ensure you have a faucet aerator that can be removed to attach the adapter. This method avoids calling a plumber, saving you time and money.
- Countertop dishwashers connect to faucets.
- An adapter and hose are usually needed.
- This method avoids permanent plumbing.
- It’s a good option for renters.
- Ensure your faucet has a removable aerator.
Let’s walk through exactly how to connect your countertop dishwasher to your faucet, step by step. We’ll cover what you’ll need and how to ensure a secure connection for worry-free dishwashing.
Hooking Up Your Dishwasher to Your Faucet
Connecting a countertop dishwasher to your kitchen faucet is a **straightforward process**. You’re essentially creating a temporary water hookup. This setup bypasses the need for permanent plumbing work. It makes dishwashers accessible even if you rent your home. The main components are an adapter and a hose. Let’s break down how to get yours connected.
Gathering Your Dishwasher Connection Supplies
Before you start, it’s important to have the right parts. Most countertop dishwashers come with a kit to connect to a faucet. If yours didn’t, or if you’ve lost it, you’ll need to get a new one. These kits are generally universal but checking your dishwasher’s manual is always a good idea. The key pieces are the faucet adapter and the hose.
The Faucet Adapter: Your Crucial Piece
This adapter is what allows your dishwasher’s hose to connect to your faucet. It usually screws onto the end of your faucet spout. Think of it like a special connector. Most adapters have a quick-connect fitting. This makes attaching and detaching the dishwasher hose very easy. It also means you can switch back to using your faucet normally when the dishwasher isn’t in use.
Checking Your Faucet Aerator Compatibility
For the adapter to work, your faucet needs a **removable aerator**. The aerator is that little screen at the tip of your faucet. It mixes air with water to create a smoother flow. You’ll need to unscrew this aerator to attach the dishwasher adapter. Most standard faucets have removable aerators. However, some older or uniquely designed faucets might not. You can usually find out by trying to unscrew it. If it comes off easily, you’re good to go. If it’s fixed or part of the faucet body, you might have a problem.
What If Your Faucet Doesn’t Have a Removable Aerator?
If you discover your faucet’s aerator isn’t removable, don’t despair! You have a couple of options. You might be able to buy an **external faucet diverter**. This device attaches around the faucet spout itself. It usually has a small lever or button to switch between regular faucet use and the dishwasher connection. Another possibility is to consider getting a new faucet with a standard, removable aerator. This might seem like more work, but it guarantees compatibility.
The Dishwasher Hose: Getting Water In
The hose connects the faucet adapter to your dishwasher. It’s usually a flexible hose designed to handle water pressure. Most dishwasher kits include a hose of a suitable length. Make sure the hose you have is long enough to comfortably reach from your faucet to the dishwasher’s inlet valve. You don’t want it stretched too tight. A kinked or stretched hose can cause problems. Ensure both ends of the hose have secure fittings.
Step-by-Step Connection Guide
Now that you have your supplies, let’s get connected. Following these steps will help you ensure a secure and leak-free setup. We’ve found this order makes the most sense for most users.
Step 1: Disconnect Your Faucet Aerator
First, you’ll need to remove the aerator from your faucet spout. Most aerators unscrew counter-clockwise. You might need pliers, but be careful not to scratch your faucet. Wrapping the aerator with a cloth before using pliers can protect the finish. Some aerators might be hand-tight and come off easily. If it’s stuck, a little penetrating oil might help. Just be sure to rinse the faucet thoroughly afterwards.
Step 2: Attach the Faucet Adapter
Once the aerator is off, take your dishwasher’s faucet adapter. Screw it onto the faucet spout where the aerator used to be. Make sure it’s threaded correctly. It should screw on clockwise. Hand-tighten it first. Then, give it a gentle snug with pliers or a wrench if needed, but don’t overtighten. You want a secure fit, but not one that damages the threads.
Step 3: Connect the Dishwasher Hose to the Adapter
Now, take one end of the dishwasher hose. This end should connect to the quick-connect fitting on the faucet adapter. Most adapters have a collar you push back to insert the hose fitting. Once the hose is in place, release the collar. You should hear or feel it click into place. Give the hose a gentle tug to ensure it’s securely attached.
Step 4: Connect the Other End of the Hose to the Dishwasher
Locate the water inlet valve on your countertop dishwasher. This is usually on the back or side of the unit. The other end of the dishwasher hose will connect here. This connection is often similar to the adapter end, with a quick-connect fitting. Again, push back any collar, insert the hose fitting firmly, and release the collar. Ensure it clicks securely. Some models might have a threaded connection here; if so, screw it on tightly.
Step 5: Perform a Leak Test
This is a **critical step** before running a full cycle. Turn on your cold water supply at the faucet. Check all connection points for any drips or leaks. Look at where the adapter meets the faucet and where the hose connects to both the adapter and the dishwasher. If you see any leaks, turn off the water. Try tightening the connections slightly. Sometimes, re-seating the hose or adapter can fix a minor drip.
Step 6: Run a Short Test Cycle
Once you’re confident there are no leaks, turn the water on again. Start a short wash cycle on your dishwasher. Keep an eye on the connections during the initial filling. Pay attention to the water pressure. Many countertop dishwashers allow you to divert water back to the sink when not in use. Ensure this diverter is in the correct position for washing.
Tips for a Secure and Reliable Connection
Getting a good connection means your dishwasher will run smoothly. Here are some tips we found helpful for maintaining a secure setup.
- Check for drips regularly. Even secure connections can loosen over time.
- Don’t overtighten connections. This can strip threads or damage seals.
- Use rubber gaskets if provided. They help create a better seal.
- Ensure the hose isn’t kinked. Kinks restrict water flow and can strain the hose.
- Keep the quick-connects clean. Debris can prevent a proper seal.
Understanding Water Pressure and Flow
Countertop dishwashers are designed to work with standard household water pressure. The adapter and hose assembly are built to handle this. However, **your faucet’s flow rate matters**. If your faucet has very low water pressure, your dishwasher might not fill properly. This can affect wash performance. Many dishwasher kits include a way to adjust water flow or divert water.
We found that most standard kitchen faucets provide adequate pressure. If you consistently have issues, it might be worth checking your home’s main water pressure. Some areas have lower pressure than others. Your dishwasher’s manual will often specify the minimum water pressure required for optimal operation. Most guidelines suggest a minimum of 20 PSI (pounds per square inch) for effective dishwashing (US Department of Energy).
Managing Your Faucet When Connected
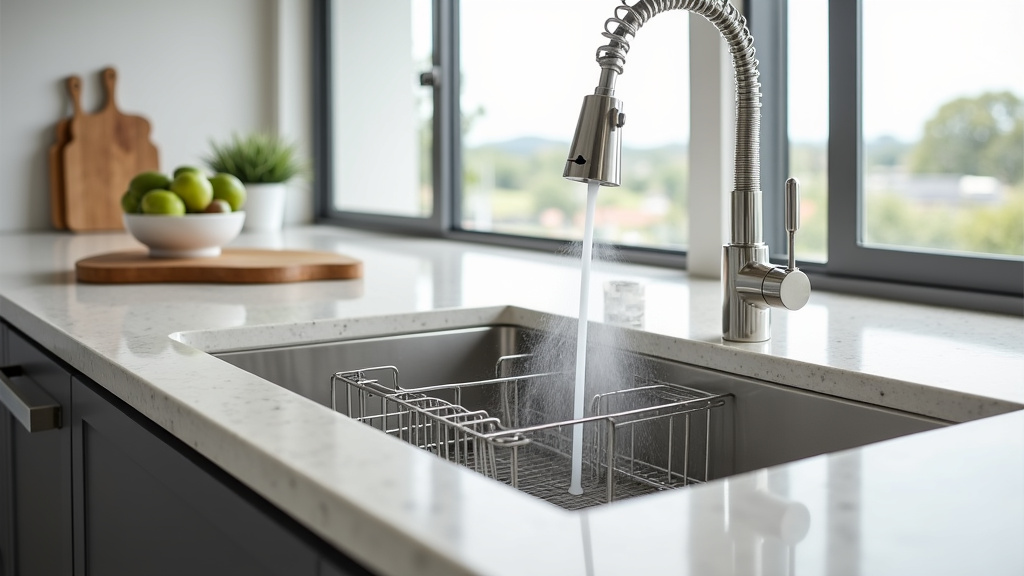
When your dishwasher is connected, your faucet is essentially dedicated to the dishwasher. You won’t be able to use the faucet for washing hands or dishes at the same time. This is why the quick-connect system is so handy. You can disconnect the dishwasher hose when you need to use the sink for other tasks. Simply detach the hose from the adapter, and your faucet is ready for normal use.
Many people ask if they can run the hot water through the dishwasher. Yes, that’s typically how they are designed to work! The adapter usually has a diverter that directs hot water from the faucet to the dishwasher. When the dishwasher is off or disconnected, the water flows normally from the faucet. Just be sure to select the hot water setting on your faucet for the best cleaning results. Most dishwashers use hot water for sanitation.
Troubleshooting Common Connection Issues
Even with careful setup, you might run into a snag. Here are some common issues and how to fix them.
| Problem | Possible Cause | Solution |
|---|---|---|
| Leaking at the faucet adapter | Adapter not tight enough; Damaged faucet aerator threads; Missing or damaged gasket | Tighten adapter; Inspect faucet threads; Ensure gasket is present and intact |
| Leaking at the dishwasher hose connection | Hose fitting not fully seated; Damaged hose O-ring; Debris in the fitting | Re-seat hose fitting securely; Inspect O-ring and replace if necessary; Clean the fitting |
| Dishwasher not filling with water | Faucet not turned on fully; Water pressure too low; Kinked hose; Adapter or hose is blocked | Ensure faucet is on; Check home water pressure; Straighten hose; Disconnect and check for blockages |
| Water flow is too slow | Partially closed faucet; Partially kinked hose; Low household water pressure | Open faucet fully; Straighten hose; Consult with your water provider or check main valve |
A Quick Connection Checklist
Before you run your first load, run through this quick checklist:
- Have you removed your faucet’s aerator?
- Is the faucet adapter securely attached?
- Is the dishwasher hose firmly connected to both ends?
- Are there any visible leaks at the connection points?
- Is the dishwasher hose free of kinks?
- Did you perform a test cycle?
Conclusion
You’ve successfully learned how to connect your countertop dishwasher to your kitchen faucet. This straightforward process lets you enjoy the convenience of a dishwasher without permanent plumbing. Remember to double-check all your connections for leaks before running a full cycle. With the right adapter and a secure hose setup, you’ll be washing dishes with ease in no time. Your next step is to gather your specific parts and follow the connection steps to get your dishwasher up and running.
Frequently Asked Questions
How do I know if my faucet is compatible with a countertop dishwasher adapter?
Your faucet needs to have a removable aerator, which is the small screen at the tip of the spout. Most standard faucets have these. You can check by trying to unscrew it counter-clockwise. If it comes off, your faucet is likely compatible.
What is the best way to test for leaks after connecting the dishwasher?
Turn on your cold water supply at the faucet and carefully inspect all connection points – where the adapter meets the faucet and where the hose connects to both the adapter and the dishwasher. Look and feel for any drips or moisture.
Can I use hot water with my countertop dishwasher connection?
Yes, most countertop dishwashers are designed to use hot water for better cleaning results. The faucet adapter typically has a diverter that directs hot water from your faucet to the dishwasher when connected.
My faucet’s aerator is not removable. What are my options?
If your aerator is fixed, you can often use an external faucet diverter that attaches around the faucet spout. Alternatively, you might consider replacing your faucet with one that has a standard, removable aerator to ensure compatibility.
How often should I check the dishwasher connections for leaks or tightness?
It’s a good practice to check your connections for drips before and after each use, especially when you first set it up. Periodically checking them weekly or monthly can help prevent minor issues from becoming larger problems.